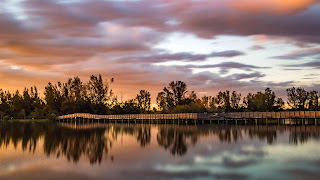
Posts

Showing posts from July, 2018

Reflections

Image
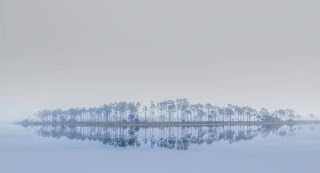
Reflections can be seen in the water, of course. But, there are other ways to get reflections. Here are a few ideas to get you started 1. A large black shiny tile 2. A mirror 3. Windows, especially at night 4. Glass surfaces 5. Sunglasses 6. Puddles 7. Ice 8. Crystal Ball 9. Software As you can see there are lots of choices other than a huge still body of water. This is excellent for you if you live far from the water. Black Tile/Granite I went to a flooring showroom and bought one big 2’ X 2’ black tile for $12.00. There is enough room to do some really cool reflection photos on small objects. Maybe you have a black granite counter or tile floors that reflect well. My favorite subject to shoot on tiles are flowers. White works great because the contrast is excellent. You can use any kind of lighting you have for these photos. Personally, I use the utility clip lamps with the LED light bulbs, because they don’t get hot. Point the light right on the subject

Night Photography and basic camera functions explained

Image
Ah, night photography.  Once I discovered the photos that could be taken at night or before dawn I was hooked!  You can do lots of abstracts at night using a “slow shutter speed” therefore blurring, making lines, doing circular motions and really cool designs.   In addition, if you are near water you can smooth the water like glass.  If you are near a highway or road you can get the car lights zooming by and make them look like long lines. *One side note: ALWAYS BE SAFE! Go with someone for extra safety-if you have no one to go with, work on smaller projects at home in a dark room.  Safety FIRST!*  All kinds of interesting photos come from night photography including making people disappear.  So, in addition to being a photographer, you can also be a magician!  What I mean by this is if you are in an area where there are a lot of people and they are moving, when you take the photo on a slow shutter speed the people will “disappear”.  It's quite fun.  Try running or

Oil and Water Photography!

Image
Oil and water photography can be a lot of fun. I did it when I first got my camera but have since seen some that are so amazing I must do them again soon. The options for colors are endless. In the photo above the colors are from a plastic  plate purchased from the second-hand shop for .99 cents. You can use anything colorful laying around the house. A lot of light is required for this project so its the perfect time of year for this. An added bonus is, you will get a little vitamin D from the sun if you do it outside. Here are the step by step instructions to do this project or you can watch the following video of Bryan Peterson explaining it. https://youtu.be/SCYG7HO_SZo 1. Put some water in a clear flat container 2. Set your container on a set of books or some other object to raise it above the ground. 3. Add something underneath to give you a cool background 4. Add some oil 5. Now you just let the oil settle 6. Shoot! Shoot!

The "Blue" and "Golden" Hour

Image
Sunsets, sunrises, water, beaches and boats can make, or very interesting and amazing photos.   You can take photos while the sun is setting, of course, and these can be beautiful.  However, there is a time of day called the “golden hour” and the “blue hour”.  One time I went to take sunset photos with my mentor, we took the usual shots and then we were all talking for a bit.  After about 20 minutes he said to us, “you see, all the people have left.  YOU are going to be the ones that get the shot!”  He was so right. The light is so much easier to photograph, you get a great glow and besides that, there will be less people to take out of the photo if you do not want them in there.   Even if you do not live where there is a beach your photos can and will still benefit from using these times of day to your advantage in your photography. So what time of day are these “magical” hours and what settings should you use? In photography, the  golden hour  is a period sh