Oil and Water Photography!
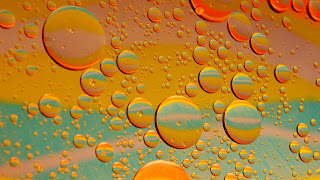
Oil and water photography can be a lot of fun. I did it when I first got my camera but
have since seen some that are so amazing I must do them again soon.
have since seen some that are so amazing I must do them again soon.
The options for colors are endless. In the photo above the colors are from a plastic plate purchased from the second-hand shop for .99 cents.
You can use anything colorful laying around the house.
A lot of light is required for this project so its the perfect time of year for this. An added bonus
is, you will get a little vitamin D from the sun if you do it outside.
Here are the step by step instructions to do this project or you can watch the following
video of Bryan Peterson explaining it.
1. Put some water in a clear flat container
2. Set your container on a set of books or some other object to raise it above the ground.
3. Add something underneath to give you a cool background
4. Add some oil
5. Now you just let the oil settle
6. Shoot! Shoot! Shoot!
Once you get your first set of photos you may be very happy with the results, but if not,
ask yourself some questions:
Are they too dark?
Too Light?
Blurry?
Wrong angle?
Once you answer these questions you can retry and improve.
Be ready to amaze your friends!
My Portfolio


Comments
Post a Comment