Night Photography and basic camera functions explained
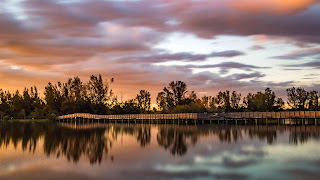
Ah, night photography. Once I discovered the photos that could be taken at night or before dawn I was hooked! You can do lots of abstracts at night using a “slow shutter speed” therefore blurring, making lines, doing circular motions and really cool designs. In addition, if you are near water you can smooth the water like glass. If you are near a highway or road you can get the car lights zooming by and make them look like long lines.
*One side note: ALWAYS BE SAFE! Go with someone for extra safety-if you have no one to go with, work on smaller projects at home in a dark room. Safety FIRST!*

All kinds of interesting photos come from night photography including making people disappear. So, in addition to being a photographer, you can also be a magician! What I mean by this is if you are in an area where there are a lot of people and they are moving, when you take the photo on a slow shutter speed the people will “disappear”. It's quite fun. Try running or walking back and forth in front of the camera, then look at the photo, you will not be in it if the shutter speed is slow enough. Fun! Now if you have that one person that stands still while everyone else is walking around, you will have a blurry person in the photo. It's fun to experiment though.
Remember, except people who grew up around cameras, everyone starts out not knowing how to use these settings. Even if it seems confusing take it a step at a time and it will all come together. If it starts to take the fun out of your photography, then put all these things to rest for a bit. Go out and shoot as you normally do, have some fun then revisit the information later on. Don’t let anything stand in the way of your fun with photography.

I have attached a couple of videos below for further information.
Basically, there are 3 things to consider:
- Shutter Speed: The shutter speed is the amount of time the shutter is open and letting light to the sensor. Slow shutter speeds are good for night photography, abstract photography and low light conditions. The opposite is true of a fast shutter speed as it will freeze the motion. Any time you are using a slow shutter speed, unless doing abstracts where you do move the camera around, you will want a tripod or something to steady the camera. If you do not have a tripod, bring a box, look for a wall or even your backpack/camera bag will work. Use any resource you have available to steady the camera. Your shutter speed is the fraction number on your settings. For example, 1/15 (1/15th of a second), 1/30, 1/60, 1/125. Depending on the light available and if you are using outside light sources (a flashlight or other lights) will depend on what your shutter speed is 1/10th of a second is an example of a slow shutter speed. All settings will be unique for each situation.
- Aperture: Your aperture is the size of the hole that lets the light in. This is measured by the F-stop. The larger that opening, the more light the camera takes in during the shot. This will also determine the “depth of field” in other words how “deeply” into an image things are in focus. The larger your F-stop number, the greater your depth of field. Depth of field changes are much less noticeable in nighttime photographs than in daytime ones.. F-stops are from F1.4 to F22. Your camera and lens will determine which you are able to use. Here is the confusing part. The larger number in the F-stop, the smaller the aperture. Meaning F/22 is a smaller opening than F/4. And F4 will give you more blur around your subject or "bokeh".
- ISO: Your ISO is another way to let more light in. However, when you raise your ISO to a higher number you will be getting more grain or as it is called “noise” in your photos. This can be taken out in Photoshop, Lightroom, and other programs, but, depending on your equipment it may or may not all be able to be removed very well. A good way to understand noise is to take a photo of a blank wall. Change the ISO by 100 or so and take another photo. Take about 5 or 6 photos of the wall, one at ISO 100, one at 300, then a few more at a higher ISO than that. Put the photo in the computer and zoom into 100%. You will then see what “noise” is. For night photography a lot of photographers use a high ISO. I prefer to stay as low as possible on the ISO and work my other settings to accommodate.

(ISO stands for International Standards Organization, and it is a standardized industry scale for measuring sensitivity to light. This can be used in relation to how sensitive camera film is to light, but more commonly today, it pertains to the sensitivity of a digital image sensor)
It may seem confusing but believe me, you can understand it. Just study one at a time. Pick just one of the 3 and read about it, watch videos on it and you will start to understand it. When you do, go to the next thing.
The main thing to remember with night photography is you need more light let in or you will have a solid black photo. Play around with the settings at home in a dark(ish) room. You can end up with some awesome photos and you can take your time figuring out what to do. Use a flashlight blinking on an object, do a scary face by putting the light under your own face. You can also do light art with glow sticks and many other fun things. Have the kids stand with glow sticks and twirl them around out in the yard. Or even better, set the timer and run around with them.

Comments
Post a Comment